Showing posts with label korut. Show all posts

14/03/2018

Colorful feather earrings - Sizzix


Hi there! You know March is a special month for Sizzix? Sizzix encourages makes to make a pledge - make it rather than buy it. I wrote about the special month in my earlier post here (link). You can read more about the "Making The Pledge!" here (link), in Sizzix site

In the theme of rather making it than buying, I made some new earrings for myself. I got the inspiration from the die I used to make them, the Bigz Feather die (link). I got the die out for my April projects for the brand and suddenly it hit me that the feathers would make just perfect earrings! So after fifteen minutes or so, I had a new pair. 


Even if I was super excited about my idea and even more when I had added the alcohol inks on top of the plastic, I realized that these would make a great step by step. So I kind of faked the two first steps for the photos as I already had colored all the feathers and punched the holes, but I believe you'll get the hang of it anyway. 

So if you want to make similar earrings to yourself, please follow the step by step below! 


Step 1. Using the feather die, diecut some feathers out of plastic. I used Sizzix die packaging for mine. I cut the two of the feathers twice and then a two more of the smaller one.


Step 2. Using alcohol inks, color your feathers. If you want the feathers more monochromatic, use just a couple of colors, but if you want to have a rainbow, use a bigger selection of colors. Remember color theory, though. If you add too many colors to same piece of felt on the applicator tool, you create mud. So better to add the colors just two at a time. 


Step 3. This is an easy one - punch little holes to each of the feathers. 


Step 4. Using black and white permanent marker, doodle and add markings to your feathers. I traced along the edge of each feather to define it more and then added some doodling to each one. 


Step 5. Then all is left is to actually put the earrings together. I added a jump ring to each of the feathers. Then I added each feather to an earring ring with another jump ring. Lastly I added the ring part to a stud earring part and voilà, the pieces of jewelry were done!


These earrings were so much fun to make! I can't wait to wear them, as I just know it'll be so much fun, too! I'm saving their big debut to this Saturday, when I'm demoing at Leimailutaivas. 

Thank you for stopping by today! See you again! Have a great day! 


Dies used: 


Materials: Sizzix, Ranger, Posca

04/01/2017

My favorite 12 of 2016: altered items and others

Happy New Year 2017! Now that the fresh new year is starting, I'm looking back to last year for a moment and dedicating the first posts of this year to different favorites of 2016.

I'm doing four posts totally, this being the last one in the series. I've already shared my 12 favorite card-like projects of 2016 (link)my 12 favorite layouts of 2016 (link) and  my 12 favorite canvases and journal connected projects of 2016 (link). This post is about my favorite altered items and special projects, like pieces of jewelry. 

Listing my personal favorites is something I've done a couple of years now. Here you can see my favorite altered pieces of 2015 (link). Here's also links to the 2014 (link) and 2013 (link) posts of "other projects". It's fun to see how the amount of those projects continue to grow as I've been forced to divide these crafts to two posts in two years now!

So without further ado, here's my personal favorites of altered items and special pieces of 2016. Like in previous post, I've included a link to the original post if you want to see more pictures or read more about the project. I've mentioned if there's a tutorial or a video in the original post.

Thank you for stopping by today! Wishing you creative and artful 2017! Tomorrow I shall begin to share new crafts! Looking forward to share the 2017 also with you!

Mini mixed media palette for Scrap FX, with teal and rust combo

Eye see you for Inspired by, with movie inspiration

Altered animals for Inspired By, with a video showing each one

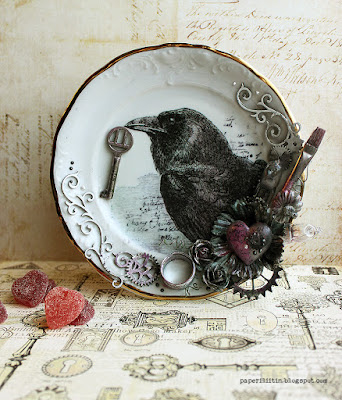
Crow talisman for Inspired by, one of my favorite piece of jewelry nowadays 

Crow old along with me for Craft Stamper, step by step in the February issue of the magazine

Altered brush for Artists Live, with a recording of the live show in this other post (link)

Wow jewelry for Inspired by, with a short video showing the piece better


Spoonful of happiness for Craft Stamper, for a masterclass article

Metallic flowers for Artists Live, with the recording of the show on the post

Altered hubcap from UK workshops, one of the exciting workshops trips last year

18/01/2016

Memory Hardware necklace - Prima Marketing


Hi there and happy Monday! How are you all doing? It seems that the spring flu season has hit our family. Better now than end of the month when the Paperworld is happening and my husband is a single parent for a while!

Today I'm sharing something a bit different - a necklace! I’m not a jewelry maker but that side of mixed media interests me and every now and then I give it a go. The Memory Hardware line Prima has really makes things easy, so even I can create a necklace in no time! For this piece I adhered a vintage image with 3D Gel underneath the glass dome and then added all the pieces together by using the Villeneuve Rings.

You can see some gorgeous projects (and this one also) in the original Prima post (link). There's also a couple of videos showing the new 2016 Memory Hardware line.

Thank you for stopping by!

PS. Some of the spring workshops have been announced, please check the sidebar for more details! Kevään workshoppeja on ilmoitettu, kurkkaa ajat ja paikat sivupalkista. Joukossa mm. Halikko, joka on vaarassa peruuntua!


Materials:

990701 – Memory Hardware Cote D’Azur Antique Chain 
991135 – Memory Hardware Bourdeilles 
990725 – Memory Hardware La Rochelle Antique Trinkets 
990626 – Memory Hardware Villeneuve Antique Rings
962890 – Ephemera Vintage Collectibles 
962982 – 3D Gloss Gel
960995 – Vintage Vanity Notes Clear Stamp

23/07/2015

Heart of Gold - Mixed Media Place


Thursday already! Soon it's weekend time! But today I have something a bit different to share with you - a pendant made for Mixed Media Place. It was posted there yesterday (link).


This piece got its start when I saw one of the hearts of the Archival Cast line in the Mixed Media Place's shop and thought it might make a nice pendant. When I then got the actual piece it was a bit bigger than I thought, but I still went along with my idea. Maybe it’s fit for a rap artist? 

As you can see from the video above, I turned the pendant into golden one with the help of a few mediums. Most of all I wanted to add shine to the piece with Fab Foil. But as that really shines, I needed then to tone the piece down. A perfect medium for that was Black Gesso combined with Gold Mica. What the Mica does is adds just a tad warmth and shine to the gesso.

Thank you for your visit today! Wishing you a pleasant evening!


Materials from Mixed Media Place:


Materials: Prima Marketing, Wow Embossing Powders, Ranger, Tonic Studios, Tattered Angels

23/12/2014

Winged jewelry - Mixed Media Place


Greetings! We have a new challenge for you in the Mixed Media Place! This time the topic is wings. Quite appropriate in Christmas time, right? But still we are not looking only out for angels, but you can interpret the theme anyway you like! If you're stuck, please check the reveal post as there's many kinds of winged ideas!

Here's my take on the theme and it's a perfect example how one idea leads to another and the coat turns into a handkerchief. My first idea was to go big and make a pair of mixed media wings. I imagined them and thought about the construction when I went to sleep. But when I then started actually doing them, I suddenly wasn't inspired anymore. Maybe the reasonable side of me took over and was shouting something like "where you are going to put those?" 


Somehow I then started to think about jewelry and my huge wings shrunk to be a tiny necklace. But I guess no harm done as I really enjoyed doing this piece! First I drew a tiny pair of wings to a piece of cardstock using a pencil and the Pitt pens. Then using an epoxy bubble cap I turned that drawing into an ornament to my pendant. I also added a couple of black feathers in to add the theme there once more. The tip of the feathers are treated with some glitter to make them more festive.

The frame around the drawn wings is a Mechanicals embellishment but the other jewelry parts are from my "mixed media stash". The big round metal bead used to belong to a purse decoration and the black rhinestone flower and the big drop shaped pearl were a part of one of my necklaces I loved back in the day but didn't use anymore. Now they have a new life in this piece of jewelry! And I must say, I've been wearing this one around town already and I guess I'll put it around my neck at the Christmas dinner.

Thank you for stopping by today! Wishing you a peaceful start to the Holidays! I've timed my blog to have something everyday around Christmas time. There might even be a giveaway around the corner!


Materials from Mixed Media Place:


Materials: Prima Marketing, Design Memory Craft, 7 Dots Studio, Ranger, Sharpie
Related Posts Plugin for WordPress, Blogger...