
Heippa, it's third and final day of this month's series for Seth Apter Creative Team. Sadly, this is the last trio for Seth Apter Creative Team as our term is about to end. These past nine months have been a blast! You can find Seth Apter's site here (link) and more about the Creative team here (link). I've included a list of products to the end of the post with links to Seth's own store. While this is the last series for this team, I have enjoyed making these posts so much, that I'm thinking of continuing making some kind of triplets in the future, too. Let me see, what I can come up with!
In the course of the previous posts I have concentrated on different mediums and tools in Seth Apter's repertoire - stamps (link), Izink ICE acrylic glaze (link) and Izink Texture mediums (link). The links take you to the previous series. But what tool was still unexplored were stencils! So, for this last series I concentrated on those. I thought nine ideas to include stencils to a project. Naturally there's so many more, but these nine I could easily tie to a project. Or a series of projects, in a way, as I made a set of ATCs using stencils in a multitude of ways. I've broken the process into three separate videos, which I'll share in the course of the following days. In each, I show a couple of techniques and also make some progress in the ATC set.
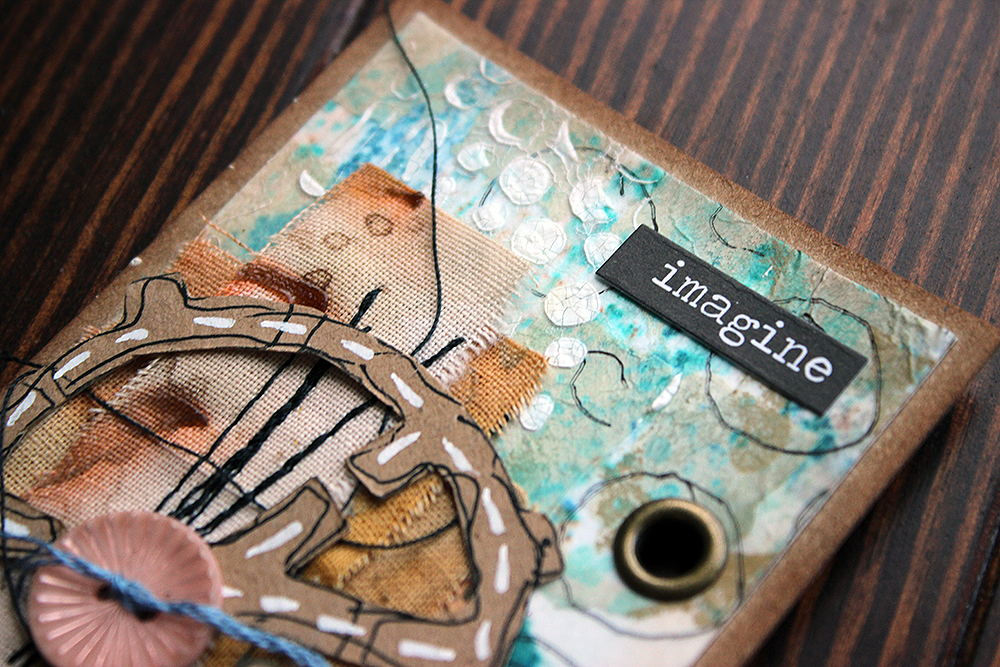
In this third video, much of the process is getting the set done. But there's two new ideas to use stencils among it! The other is using stencils to embroidery and other to cut.
The elements I'm doing using embroidery in these cards are more or less such that I could have done them without a stencil. But while they are quite easy, the segment is there to illustrate another possibility to use a stencil in your project. You don't have to do mixed media in order to use stencils. If the stencils are food safe, you could use them to decorate cakes and pastries. If you work with clay, you could either paint the pattern or use the stencil to make a dimensional pattern to your pottery. Or if you like embroidery, you could use them as a guide for your stitched design. Like I have said in the previous two posts, the only limit is your imagination! Although I've studied costume design, embroidery hasn't ever been my thing ever. But just think what you could do with these elements with long stitches, filling the pattern with different colors! Or tracing the elements using back stitch and then filling each element with French knots, chain stitch or cross stitches.
The final idea I'm sharing with stencils is using them as cutting guides. Like I say in the video, if you are really confident, you could cut through the stencil. BUT there's always a risk in there. I wouldn't dare to put a blade near my stencils as I'm such a speedy Gonzales, I probably ended up ruining them. But sketching through them and then cutting is always an option! It also gives you more room to think about the design. For example, if I had cut straight through the stencil, I wouldn't have gotten such elements but quite the opposite. Sketching and then cutting also allowed me to make each of the elements unique. You could also use the flip from the first video as a way to sketch the design! Spray some ink through the stencil, flip it to the cardstock and then cut the colorful elements loose!

I think I've said it before but when working on a set or a series of projects, doing a "master sheet" is handy. Like I did two collage sheets in these ATCs. Both of the sheets have similar color schemes and similar layers, but when I cut them into smaller segments, each of the cards is unique. They go nicely together, but make up a definite series because of the colors, elements and layers. Also, working with a bigger sheet might be faster and more fun than fiddling with small, individual segments right from the start. But that's just my way of doing things!
This post is the last one I made for the Seth Apter Creative Team. Like I say in the first paragraph, I'm thinking of continuing of doing some kind of triplet each month even after the term is done. I want to thank Seth so much for this opportunity and all the tips he has shared. I also want to thank every team mate for the journey, for the encouragement and love. I hope we stay in touch! And last but not least I want to thank you, dear blog readers, of checking the posts, commenting on the videos and IG posts. Thank you so much for all the love and encouragement and wishes you've sent to me! As a small thank you to all you Seth peeps, please keep an eye on the Seth Apter Creative Community in Facebook.
Thank you so much for stopping by today! Have a wonderful, inspiring weekend! I hope you won't be a stranger <3

Materials:
PaperArtsy - Fresco Finish acrylic paint Cerulean

Materials: StencilGirl, Aladine, PaperArtsy, Tim Holtz, Prima Marketing, Posca, Sakura


1 comment:
Although I’ve stitched on cards before, it never occurred to me to use with a stencil. Brilliant!
Post a Comment