Hi there! Today it's third part of this month's series for Seth Apter Creative Team. This time I started already on Tuesday as I have four posts instead of the usual three. Let me tell you why there's four in a bit, but first you can find Seth Apter's site here (link) and more about the Creative team here (link). I've included a list of products to the end of the post with links to Seth's own store.
So, why there's four posts this time instead of the regular three, is because of the subject I was inspired by this time. Not so long ago Seth came out with some wonderful texture pastes. There's four of them - Crackled, Flakey, Beads and Sandy. Can you see where this is heading? Yes, I used each paste to create a piece, so there needed to be four. I also wanted the pieces to have a common nominator, something to tie everything together. I could have chose anything, but the number four made me think about elements - earth, fire, air and water - and thus the theme was chosen. I then paired each paste to an element and created a piece with a process video.
I'm working with the pastes in these pieces for the first time. I did a quick little swatch from each of them to see what they looked like for my pairing process for each element, but otherwise I just jumped head first to the pool and thought to see what I can make the pastes do.
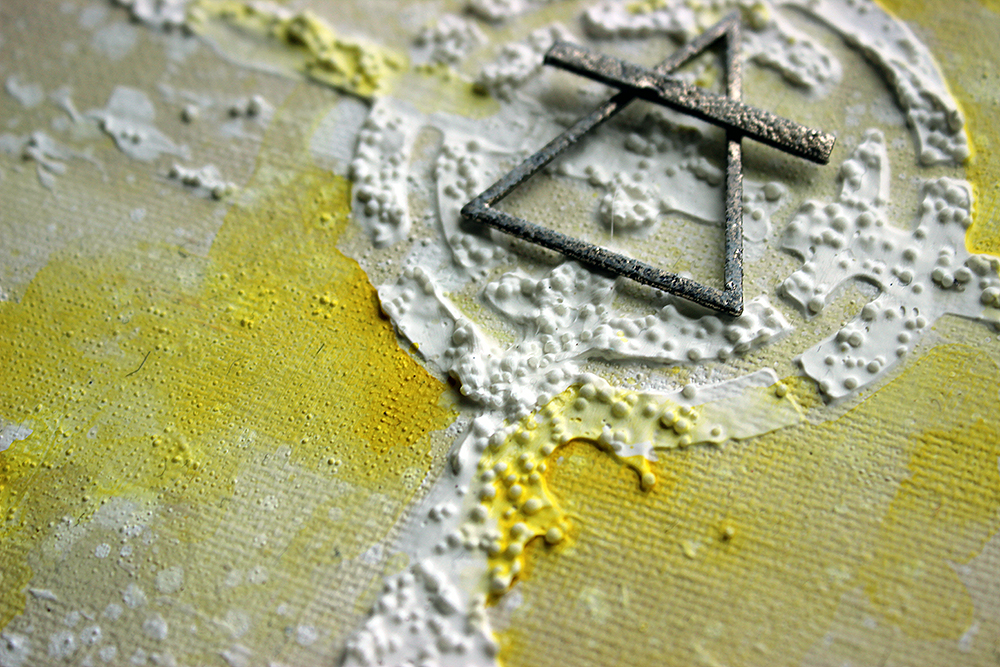
Today's piece is a bit different in a couple of ways than the other two already shared. As you can see, in this piece I didn't color the paste itself but instead added a hint of color on top. The other difference is the background. Where as earth and fire started with an almost solid background, here I created some color blocks to add a little bit of interest and movement to the piece. I also didn't apply the paste by free hand but through a stencil.
I paired air with Beads. The texture of the paste reminded me of little air bubbles, foam or froth, so it felt like a good match. The paste looks airy and foamy even after drying. The beads caused a little bit of change of tactics when stenciling. I usually "scrape" on top of the paste to remove extra, but this time it wasn't the solution - I would have removed almost all of the beads! So, instead I applied the gel a bit more heavy handed than usual and then removed the stencil carefully ending up with a lovely, thick layer of paste.
As I mention in the video below, I added some yellow tones to this piece to have a full set of primary colors. Fire was red and the water one, which I'm saving for the last, needed to be blue, so I thought to add a yellow to the pieces as well to make up the primaries. Even though there's yellow ochre, a clay pigment, I felt that earth couldn't be yellow. But air could, it could have the sunshine tones through clouds! I used a duller, more muted palette in the background but went with a vibrant yellow on the top layer. If you want to see how I made the piece, please see the video below!
As I'm working with the pastes for the first time in these four pieces, I'm following my gut a lot. Well, that's actually the case with a lot that I do, but this time even more so as I don't have knowledge how the pastes will react with other mediums. In this particular project it was adding the gesso on top. The paste might have worked just fine without it, too, but to my eye it looked so "plastic" and shiny, that I was afraid the watercolor would just run off from it. And like I say in the video, the other good thing about adding the gesso there was that I got to transform the base into mat.
Whenever I'm using a new product, I usually try to let it air dry rather than grab my heat tool immediately. Air drying shows kind of the true nature of the paste as with the heat tool you can overheat and boil the mediums. Don't get me wrong, I usually try that, too, to find out what texture it creates, but it's not the first thing. Whenever in doubt, leave to air dry would be my go to.
Now there's three of the four elements done! The last one is water tomorrow. I hope you will be back then to see it! Thank you for stopping by today!


No comments:
Post a Comment