
It's Friday, yay! I've been doing some guest posts to Elizabeth Craft Design blog. A few days ago another post (link) went live. This time I created two pages using the same idea. The first page is about my younger daughter and the second one about a workshop trip. I shall share the other one tomorrow.
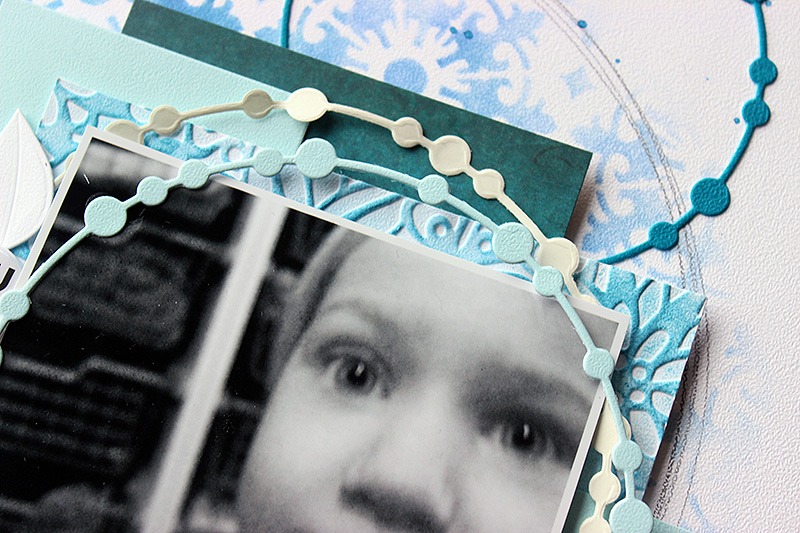
My daughters used to be keen photographers. A lot of the photos were too shaky or too underexposed to actually make out the subject but there's gems like the one I used in this page among them. It's fun and interesting to see the world through their eyes! One of my favorites is this family portrait I scrapbooked previously.
"Used to" I say because our small pocket camera broke and now we only have two huge SLR cameras in the family. They are too heavy for them to use. We really need to buy a new pocket camera so that they can start taking photos again!

The topic of the layout is partly how my kids used to take photos but also about my younger daughter who managed to take this selfie with the camera. Even though both of the girls took photos, it really was my younger one who was more into the thing. Well, actually she's more into all things electric and gadget-like.
Underneath you can see the steps how I made the page! Before getting to those, I want to thank you for stopping by today and wish you a wonderful weekend!
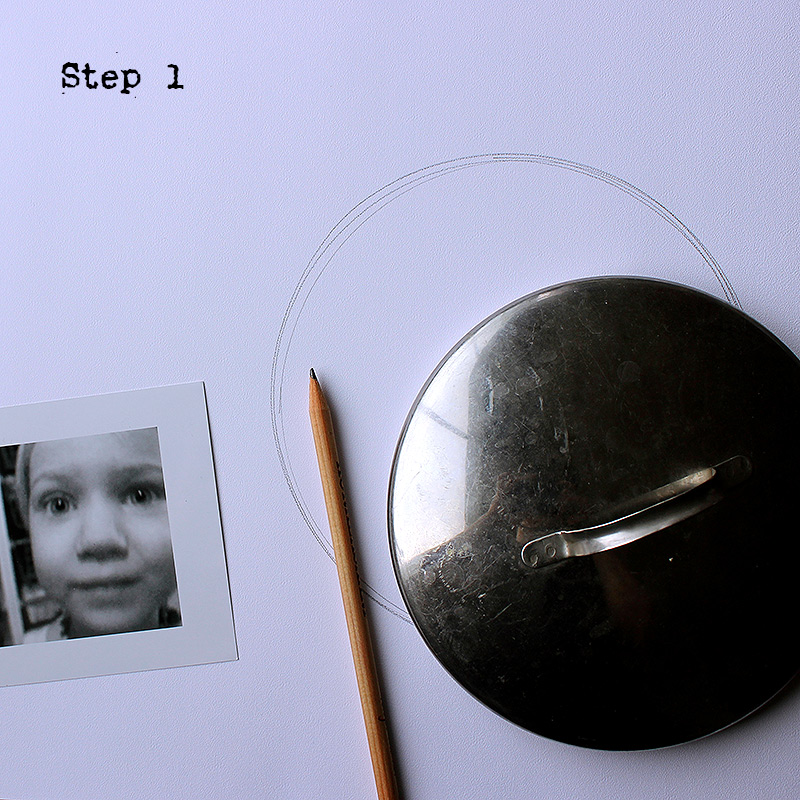

Step 1: Choose your photo and background paper. I used the white cardstock in my page. Then use something round like a kettle lid to draw a couple of big circles to the background. Think about your composition as the circle should go underneath your photo.
Step 2: Use the "Medallion" stencil to create some pattern inside the circle. Use ink of your choice and move the stencil around so that you can cover the whole area.
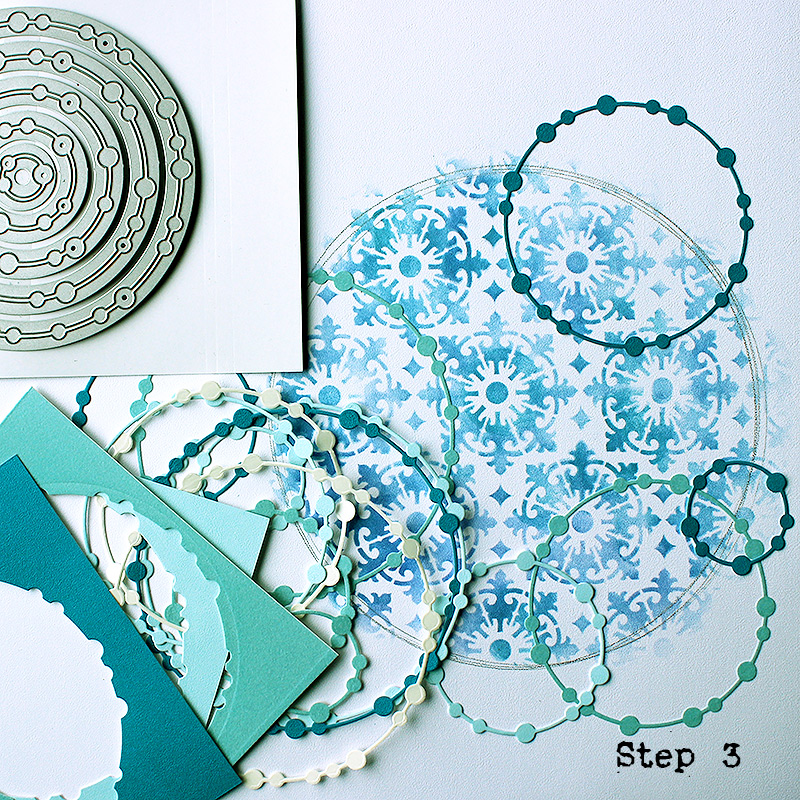
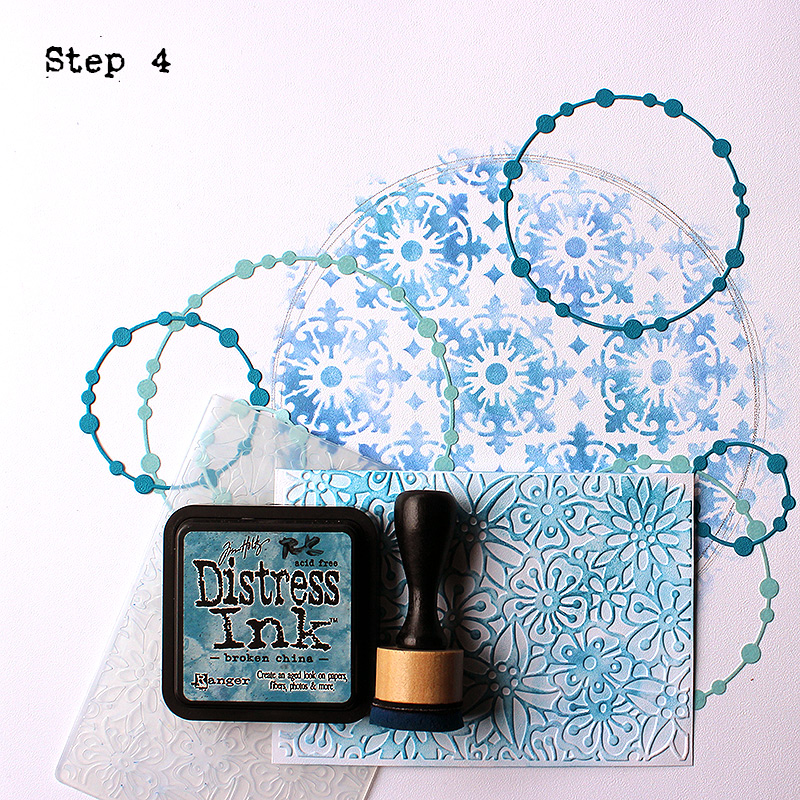
Step 3: Use the "Beaded Circle Frames" die to cut circles. Use two turquoise papers from the "Timeless" set and also mix in some "Light Blue Velvet Adhesive Sheet" as well. If you want to make things easy, adhere a Clear Double Sided Adhesive Sheet underneath the cardstock before cutting.
Step 4: Use the "Bouquet" embossing folder and emboss a piece of the white cardstock. Then color it using the same ink you used to make the background.
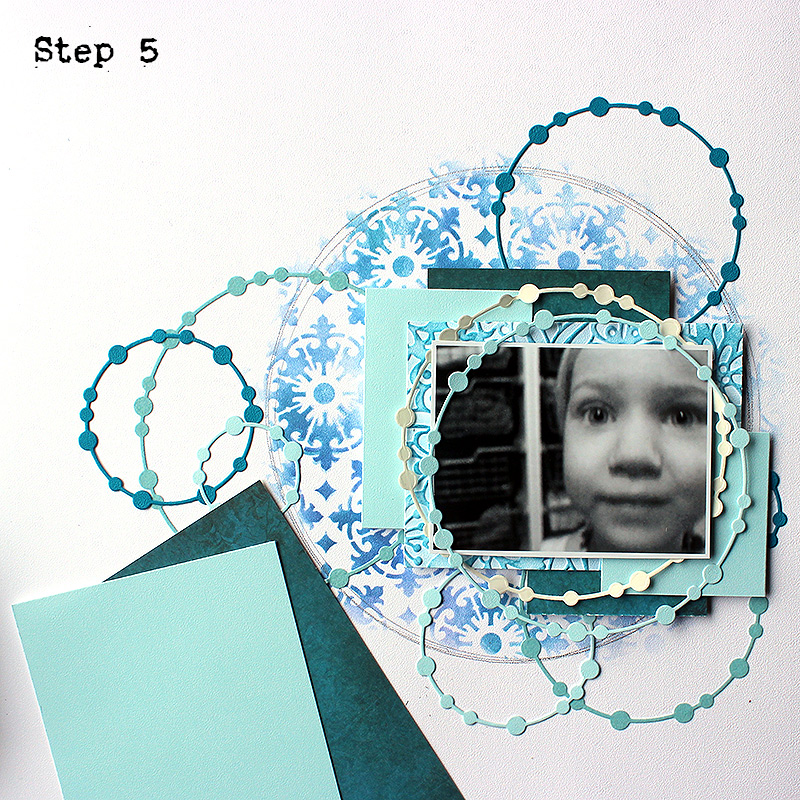

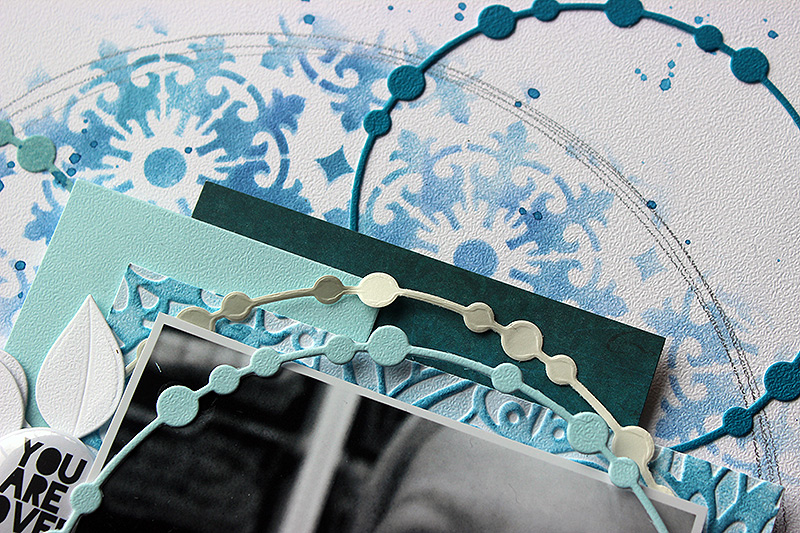
Step 5: Layer the embossed piece and some papers underneath the photo. Mix some of the cardstock with patterned papers for the layers. Also add a couple of the die cut rings on top of the photo as a frame.
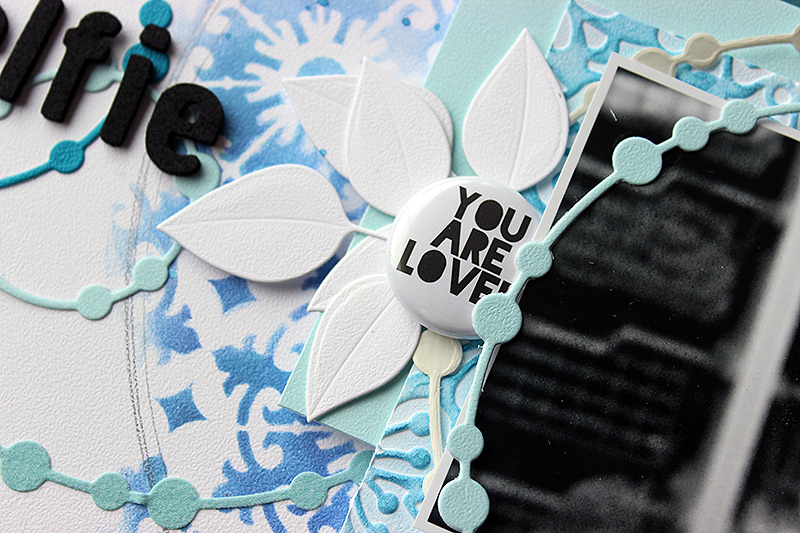
Step 6: Use the "Big Triple Leaf" die to cut a couple of leaves from white cardstock. Add them to the page together with a flair button of your choice.

Step 7: Make the title to your page using sticker alphas and hand drawn letters. Use the "Alphabet 2 Lower Case" die to make an alphabet stencil using a piece of scrap paper and then trace the letters through it.
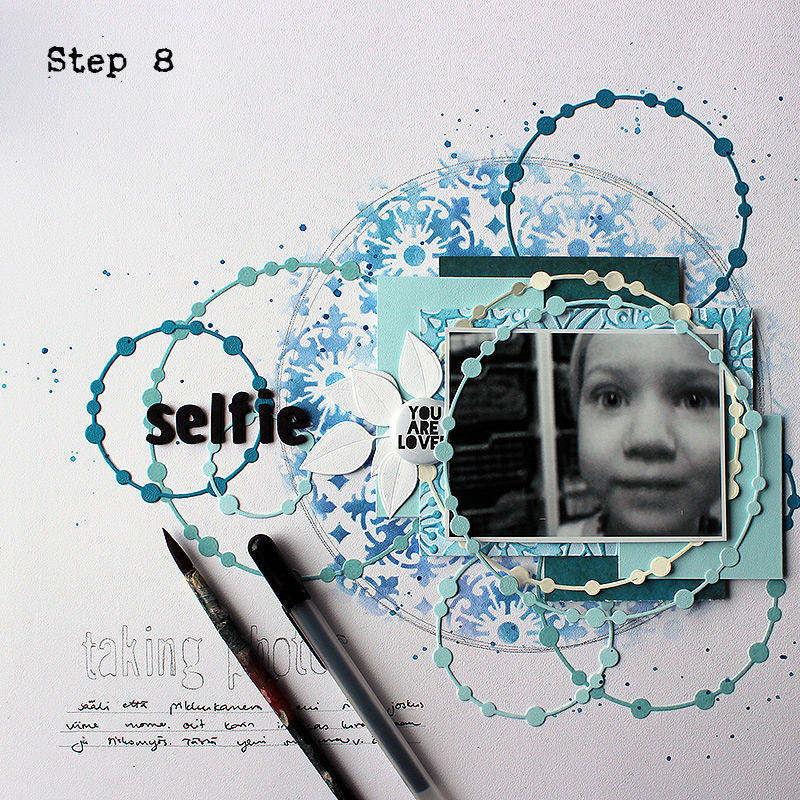
Step 8: Finish the page with journaling and some splashes with watercolors.
Supplies:
Elizabeth Craft Designs:
Other:
Distress Ink (Broken China)
Patterned paper (7 Dots Studio - Fortune-teller - 6x6 pad)
A flair button (A Flair for Buttons - Minimal 2)
Sticker alphabets (American Crafts - Thickers Foam Wonder Black)
Watercolors (Prima Marketing - The Classics)
Foam dots
Black thin marker
Pencil
2 comments:
Kaunis.
Beautiful page, Riikka. And, the photo of your daughter is adorable - the look in her eyes is full of wonder!
Post a Comment