Showing posts with label lahjaksi. Show all posts

01/12/2022

Holiday Cheer - Finnabair Brand Ambassador


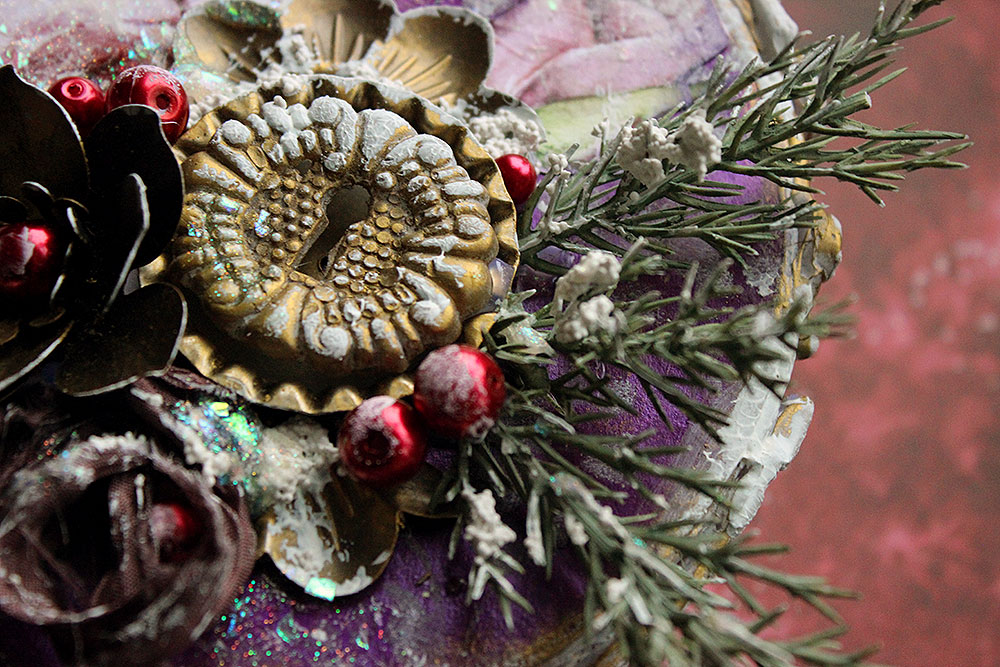
It's the season of gifts and giving! Well, that should always be the time, but it seems that Christmas is the height of that season. So for a December Facebook live I went with a decorated gift box! I'm recreating this piece this coming Saturday, December 3rd at 7 pm CET. Hope you can join me! 


During this live I'll make my own snow paste using two components but I also use "Unicorn" effect paste to add a little bit of icy shine. I also use a tool that I don't normally use in that purpose! Can you guess what that is? 

If you want to craft along side me or just to check the materials, the list of them is underneath the next photo. Links go to Mixed Media Place, Finnabair's own store.

Thank you for stopping by today! Hopefully I'll see you on Saturday!
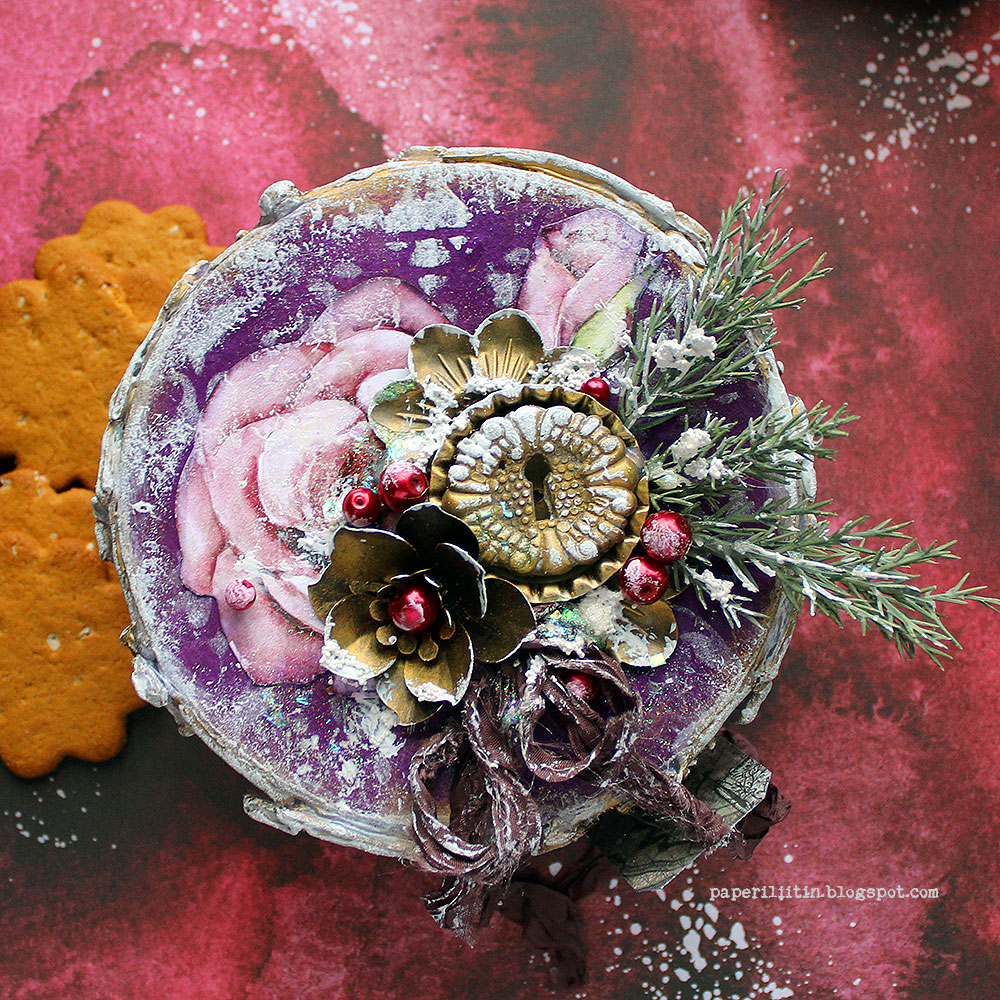

Materials from Finnabair line:
(links go to Mixed Media Place, Finnabair's own store or to brand's website)

Finnabair mould Baroque Frames
Mechanicals Bottle Caps

Other:
Ranger - Distress Ink Villainous Potion ink pad
Prima Marketing - Memory Hardware Peals VI Pink Passion
Posca - paint marker PC-1M Gold
cardboard gift box
faux coniferous branches
ribbon
hot glue, craft glue
scissors
ink blending tool, wax brush, paint brushes, sponge




20/04/2018

Unicorn dream catcher - Sizzix


Sweet Friday! Or should I even say "sweet dreams"? Here's a little pastel dream I made using Sizzix dies. The inspiration to this dream catcher came from the feather die I ended up using for the trail of the catcher. I was intrigued by the shape of them and I wanted to use the die to something. As dream catchers seem still to be a thing, I thought to have a go with it. Then I put two and two together and thought to make a dream-like fairytale dream catcher. 


The unicorn die also contributed to the color scheme - I wanted it to be cute and soft. As my goal for this year is to use more textiles in my projects, I wanted to use something else than paper for the flowers so I took a look at my stash of felt. I picked up pale pink, light yellow and spring green. To form the base to the flowers I used a vine die and made a wreath like composition to the bottom of the dream catcher. 

First I thought to weave the net part of the catcher but then I managed to find a crocheted doily that was just the right size. Somehow the lace-like doily looked so much better and fitted the sweet, fairytale themed catcher fit for a princess.

I hope you liked this craft! From main Sizzix site (link) you can always find more inspiration, link to free downloadble papers and to current giveaways and competitions. Like now there's links for example to the new Making Essentials (link)wedding inspiration (link) and spring giveaway (link).

Thank you for stopping by today! Have a great start to weekend! 


Sizzix products used: 


Materials: Sizzix, Prima Marketing


27/03/2018

Easy painted confetti gift box - Prima Marketing


Hello there! Sorry for the absence! I've been getting ready to some workshops and haven't timed the posts ready. Today I'm sharing a quick and easy gift box idea I created for the Finnabair at Michaels site. It was for the 101 section which is meant as an introduction to mixed media and mediums, just easy, quick, fun projects. 

All of the mediums and tools are now available from Michaels. If you don't live near a Michaels store, you can also purchase the products from their webshop (link). Unfortunately that is only for US only. 

If you want to upload the tutorial in a .pdf form, please visit Finnabair at Michaels site here (link). You can the tutorial below there, on Mixed Media 101 section, but also a huge amount of other tutorials created for mixed media beginners. If you are looking for even more inspiration, you can find more downloadable tutorials here (link) or if you rather watch some videos, then choose "Video" page here (link)

Thank you for stopping by today! A little box like this could also fit for Easter! Have a great day! 


step 1. Gather your supplies.


step 2. Apply the black gesso through the stencil and let dry. 

step 3. Paint the box using one of the paints in the set.

step 4. Paint the pattern using the two other paints in the set. Add some splashes, too. 

step 5. Finish the box with a ribbon wrapped around and turned into a bow.

09/02/2018

Bookmark - Sizzix


Hello there and happy Friday! Today I'm sharing a little something I did using Sizzix dies. It's a bookmark with mixed media touches and really easy construction with a ready tag. But first a hint for you - would you like to win a new Foldaway machine? Well, if you said yes, please follow this link and see how to participate (link)! And if you tried your luck in the previous Sizzix giveaway, be sure to check if you won from here (link)

But back to the bookmark! I started by cutting a slightly smaller piece of gelliprinted paper than the tag. I used a ready tag here, but naturally you could do your own with "Tag Collection" die set as well. Then I cut the bird and the wreath in a number of materials using the "Songbird" die. First I cut it from an old book page, then using the patterned paper and finally the bird part of thin cork. I matched the patterned paper to the colors of the gelliprinted paper and somehow the book page seemed really appropriate for such a craft! Then I just layered and adhered everything together and trimmed the extra off. I finished the piece with a little flag saying "you are here" in Finnish. You can see all the dies in a list below and naturally find them from Sizzix site (link).

I made this bookmark plain out of need for one! I read to my girls in Finnish every second night (my husband reading in Swedish every other) and thus far I've been using whatever little note as my bookmark. But something like this could be a gift for a friend, too! If you'd like more Valentines inspiration, please see this page at Sizzix site (link). There's also new printable papers there! 

Thank you so much for stopping by today and have a great start to the weekend! 


Dies used: 


Materials: Sizzix, Talens, Elizabeth Craft Designs, Prima Marketing, Ranger

19/11/2017

Artful Adventures in Mixed Media


Hi there! Holidays are coming and I have a gift tip for you! Like I wrote in one previous post, "in my honest opinion, everyone should read this book. It's thrilling and exciting!" So if you are looking for a gift idea for either to an artsy friend or to yourself and still don't have read the book, I highly recommended it! It gave me a lot of inspiration.

The "Artful Adventures in Mixed Media" is a book by mixed media artist Nathalie Kalbach. It demonstrates how you can turn your observations and experiences into beautiful pieces of art. The book offers tips on how to gather inspiration but also guides with the colors, composition and art basics. The book has eight chapters and they are like building blocks - you start with the base and go for the height. Everyone can be creative and many things can spark that inspiration.

The writer, Nathalie Kalbach is a self-taught artist now living in New Jersey. She has an unique way of using colors and creates wonderful artworks that represent her surroundings and travels. I especially love her city canvases! You can find her site here (link) where she also has a little shop where you can get the book (link) but also her designs as stencils or stamps (link)

I received a copy in the summer and got so much inspiration out of it! Like I said in my first Instagram post about the book (link) - waiting for the part 2! It was a perfect timing to read it as we were planning and waiting for a summer trip and the book gave me a lot to think about. I really enjoyed reading the book as it has the spark that Nat has in her, joy and excitement just flowed from its pages. We even used the book as the source of one of the Inspired By's with Marsha (link)

Like the title, "Artful Adventures in Mixed Media", suggests, the book is about adventures, about gathering inspiration on the go. It can be a walk around the block or an adventure in the internet but there's also ideas about documenting and gathering inspiration during a holiday or travel. As I'm always intrigued by inspiration, it was interesting read how Nat uses her travels as the source and how she documents those to be used later. 

Like I have said, the book is a great source for inspiration but also a good introduction to art on the go or to mixed media to whom the subject is new. There's seven chapters by Nat herself and the last, the eight one with the title of "Absorbing art made by friends" which shows inspiration from other artists. These include for example Birgit Koopsen, Seth Apter and Julie Fei-Fan Balzer. If you wish to read more about the book, you can do it here (link).  

Thank you for your visit today and have a great start to the new week! If you have already read the book, I'd love to hear your thoughts! 

03/11/2017

Pan Pastel gift box - Craft Stamper


Friday-yay! Yesterday I shared a card I did for a Masterclass article in Craft Stamper which was published last December. Today I'm sharing a gift box that was in the same article. The piece was about Pan Pastels and they are the only colorant in this box. I've used them to turn the bird into a great tit and add snowy, frosty touch to the cover of the box. 

Have you started to think about Christmas presents yet? I still haven't bought anything, but have slowly started to think about what to give people. What's your best Christmas tip?

Have a peaceful weekend! Ta ta for now!


Materials: Pan Pastel, Prima Marketing, 7 Dots Studio, Rager


28/07/2017

Chainmail notebook cover - Finnabair Ambassador


Moikka! It's Friday and weekend starts soon! This piece is special to me in two ways - first that it made an appearance in the Finnabair Ambassador Cafe and it's made for a member of my favorite band. I'm also giving this away this weekend when I'm attending a heavy metal festival at Tampere. 

The topic of the Cafe is this time "my journey". The ambassadors got to choose whether they interpret the theme as their personal journey or how they create on the go. Please visit Finn's blog (link) to see how each one interpret the theme


Like I write in the Cafe post, I don't create that much when I'm on a vacation and on the go. If I'm travelling for a workshop I naturally create the class sample and sometimes even something extra, but if I'm on vacation with the family, I rarely even have any craft supplies with me. I guess if I'd be on the go for weeks and weeks I would need something to let the creativity flow. Then an art journal would be something to have with me.

What I do pack with to a vacation is an album or even a paper bag to gather the ephemera from that trip. My favorite thing nowadays is a box styled minialbum, like this one I made for London (link) or this I used when attending Finnabair's classes for the first time (link). The box allows me to add all the things to one place and the album catches the impressions I have the moment I have them - during the trip.


But now for the project. It's a part of a series of some sort. It all started with a big warrior canvas (link), continued with an altered violin (link) and then another canvas, black and white heart (link). They all are pieces I've created inspired by Turisas and especially one of their gig posters (link). What the pieces also have in common is that each of them is given to a member of the band. This journal is for Jesper Anastasiadis, the bass player of the band.

The inspiration for this cover came from the chainmail on the gig poster. The texture transformed to the can opener tabs in my mind and so I purchased several openers from the local recycling center. When adhered close to one another they created a lovely texture that reminds me of the chainmail. First I thought to adhere the pieces layered on top of each other but the texture looked better this way. 

I wanted to keep the texture of the openers as visible as possible, but the cover seemed to need at least something. So I added a couple more embellishments to finish the cover, a couple of gears, a bottle cap and also a star. 

The dark background is done with black gesso, then there's Impasto paint on top, the turquoise, and then I added the metallic shine on top using the metallic waxes. I also added some "oil splashes" to the cover by mixing black alcohol ink, Soft Gloss Gel and black glitter. 

Thank you for stopping by today! Have a great start to the weekend! 


Materials: Prima Marketing

05/07/2017

Gift bag - Prima Marketing


Oh my. I just can't do clean and simple! The guidelines with the projects done with the Michaels products is to keep it simple. But I haven't managed that really well so far... You can see some of the previous projects here - rosy ATCs (link), rusty mini photo display (link) and an album cover in teal (link). If you are pondering what I'm meaning with Michaels, you have missed the info that some of the Julie Nutting and Finnabair products are now available through Michaels in USA and Canada! 

My idea behind this bag was to create something really easy and simple that would be great to duplicate. The original idea was to make a set of a tag and a gift bag with the same stamp but then I thought it was too little and started adding the little stamped roses and Microbeads and some flowers and... well, it was a kind of avalanche! Maybe one day I'll be able to actually create something simple! But nonetheless, this set is SO easy to create! It's just stamping, coloring and adhering. 

Thank you for stopping today! If you have a suggestion or would like to see a product in the Michaels repertoire (link) in use, please hint me and I'll do my best to showcase it next time! 


Materials: Prima Marketing, Ranger


11/12/2016

Sweet presents - Prima Marketing


Have you seen the Prima's 12 Days of Christmas posts yet? This year the company did the series a bit differently and covered the 12 days just in three posts - fun, right? That way you could see all the yummy and beautiful projects faster and have time to make some of your own for the Holidays! Here's the links to the posts - for the first with days 1 to 4 (link), for the second with days 5 to 8 (link) and for the third with days 9 to 12 (link).

I'm going to share my projects for the feature during the next week or so, so please stay tuned!


12 DAYS OF CHRISTMAS_2

At least to me packaging gifts is at least as heartwarming as buying or making them. It’s fun to make the presents pretty and cute. Do you have the same trade?

For these two I first made the wrapping paper myself and then decorated the presents with some wooden alpha and doilies. The wrapping paper is done using the watercolors and Iron Orchid décor stamps. I used regular printing paper as my base and after stamping crumbled the paper for a fun, textured effect.

If I could wrap you all a present it would be filled with love, hugs and wishes for a great Holiday season and fantastic new year! Thank you for stopping by today!


Materials:

590253 – Watercolor Confections Pastel Dreams 
584269 – Watercolor Set Tropicals 
814342 – Décor Clear Stamp Fleur 
584696 – White Paper Doilies 
587420 – Wood Alphas 1” House 
590727 – Sweet Peppermint Jingle Bells 
583026 – Plumeria Trim 
580421 – Waterbrush set 


Materials: Prima Marketing, Ranger


15/02/2016

Valentines Boxes - Prima Marketing


Staying in pink and sweet for one more day - Valentine's Day could be everyday, right? So sharing these little candy boxes I made for Prima. If you wish to see a step by step tutorial, please visit the original Prima post here (link) as there's a Snapguide tutorial for these.

The boxes are made using the "Tales of You and Me" collection - quite a perfect one for all things Valentine! To make the two boxes I used just one 12x12" sheet of patterned paper. And there's extra pieces left of that sheet, so you can use those for another project or for decoration. By adding a window to the front you can immediately see the goodies inside - and if you use a die or a punch to make the window, you can then use that piece as an embellihsment, too. Once you get the hang of the folding, these can be done in no time!

Have a great day! Hope to see you tonight as it's my time in Artists Live show! More info about what I'm doing and the time of the show in this earlier post (link)!


Materials:

990817 – Tales of You and Me – Contes de Toi et Moi
582326 – Royal Menagerie SIIC
586843 – Blush Gold Flowers
579562 – Garden Fable Wood Icons
583696 – Paper Doily White
990862 – Artisan Adhesive Tape

17/12/2015

Gift paper bags - 7 Dots Studio


Hello! Do you remember the 7 Dots Studio seasonal kit? Click here to find out more (link). Here's one more project with the seasonal kit!

Are you puzzled by the paper bags in the December Memories kit? I just love to use those in my mini albums to hold the extra photos and ephemera but they are great as gift bags also. Here’s my take on the topic.

These are really easy and quick to make – just layer some pieces of patterned papers and die cuts from the kit on top of each other, staple together and attach to the bag with a sticker decorated clothes pin! 

The toppers all have a piece of patterned paper on the bottom and then a number “tag” cut from the “Typewriter” paper in the kit layered on top. As I didn’t use the golden yellow pieces in my two other projects they were perfect here as they match the kraft colored paper bags so well.

Thank you for your visit! Please share your creations with the kit if you have it and use it!


Materials: 


Materials: 7 Dots Studio, Ranger


Related Posts Plugin for WordPress, Blogger...