
Happy Wednesday! This month is BCAM month - Breast Cancer Awareness Month. Prima wanted to take part in the action as well and this Monday the daily post was all about pink and inspirational quotes. You can see the whole post here (link) - there's some amazing projects and inspiration there!
I took another route with my project and created just something pink and inspirational. When I first saw the 9,5x12” stencils with inspirational texts, I immediately thought about their use in scrapbooking. Even though both of my grandmothers are passed because of the disease, I wanted to do something not directly related to it. In this page I wanted to combine the important reminder to a layout for my younger daughter. I picked a photo that resonated with the “go” as she’s playing with her kick scooter but naturally I meant the saying in a broader sense.
I took another route with my project and created just something pink and inspirational. When I first saw the 9,5x12” stencils with inspirational texts, I immediately thought about their use in scrapbooking. Even though both of my grandmothers are passed because of the disease, I wanted to do something not directly related to it. In this page I wanted to combine the important reminder to a layout for my younger daughter. I picked a photo that resonated with the “go” as she’s playing with her kick scooter but naturally I meant the saying in a broader sense.
To keep the text readable, I added everything else to the side of the page and kept the background otherwise untreated with any mediums. If you wish to see how I made the layout, please scroll all the way down for a step by step tutorial!

Talking about step by step tutorials - the first issue of Mixed Up magazine is out and there's an article with a step by step tutorial by me in there. There's also a bunch of other tutorials, oozes of stunning projects and a lot of info so head over to the magazine site (link) to check it out. You can find the directions how to purchase your copy also in there! Underneath is a sneak of my project also.


But back today's project and the step by step tutorial! You can find it underneath. Hope you'll like it and thank you so much for visiting my blog today!

Step 1. Start the layout by misting the text to the other side of the 12x12 sheet. Use Black Tulip color from the new Color Bloom 2 mists. Be careful not to over mist the paper so the image stays crisp.

Step 2. Dry the mist layer. Shift the stencil a little to down and right and stencil the words again, this time using Art Alchemy paint. Add also some splashes to your background using the same color.

Step 3. By using the Rossibelle papers, build some layers behind your photo and also add a couple of paper details to your 12x12 sheet. Use foam dots to mount the photo to the papers.

Step 4. Combine the two - the background and also the photo cluster. Use foam dots to adhere. Make sure you don't cover too much of the text so it's still easy to read.
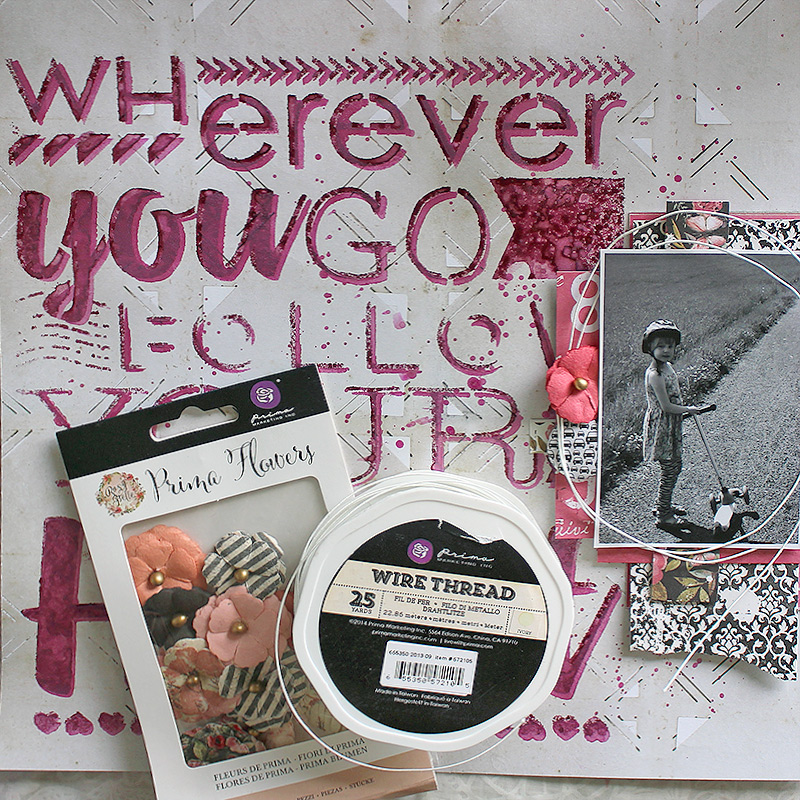
Step 5. Embellishing time! Make a few swirls with the Wire Thread and add a lovely Rossibelle bloom to the mix as well.

Step 6. Add some contrast and detail to the page with a black marker. Trace the important part of your text with it and also use the stencil to doodle some hearts around the photo.

Step 7. Finish your design with the Druzy Stones. And your page is done!


Materials:
847777 – Rossibelle Vintage Memories 12x12
847784 – Rossibelle Nostalgic 12x12
585167 – Rossibelle 3x4 Journaling Cards
585204 – Rossibelle 4x6 Journaling Cards
588151 – Wherever you go… stencil
588793 – Color Bloom 2 Black Tulip
963132 – Art Alchemy Paint Metallique Magenta
590581 – Rossibelle Melody Flowers
586980 – Rossibelle Druzy Stones
572068 – Wire Thread Stark White

Materials: Prima Marketing, A Flair for Buttons, Ranger

Materials: Prima Marketing, A Flair for Buttons, Ranger

No comments:
Post a Comment