
Hi there! Today is the first day of my second batch of posts for Seth Apter team. When we started, we all were assigned a month of our own and I got November. So, I thought to add something personal for these posts. You can find Seth Apter's site here (link) and more about the Creative team here (link). I've included a list of products to the end of the post with links to Seth's own store.
I'm a clothing designer by education, but I haven't done that job for almost at all during my working career. What I have done instead is worked as a seamstress in different theaters and Finnish National Opera. I really loved each of those jobs, to be a part of the illusion. Fast forward a little bit closer to the now, after changing to a different job, I still sewed some. Especially when my two girls were small, I sewed more and made some dresses to them - including fancy princess dresses for their 3rd birthdays - but nowadays I sew way more paper than fabric!
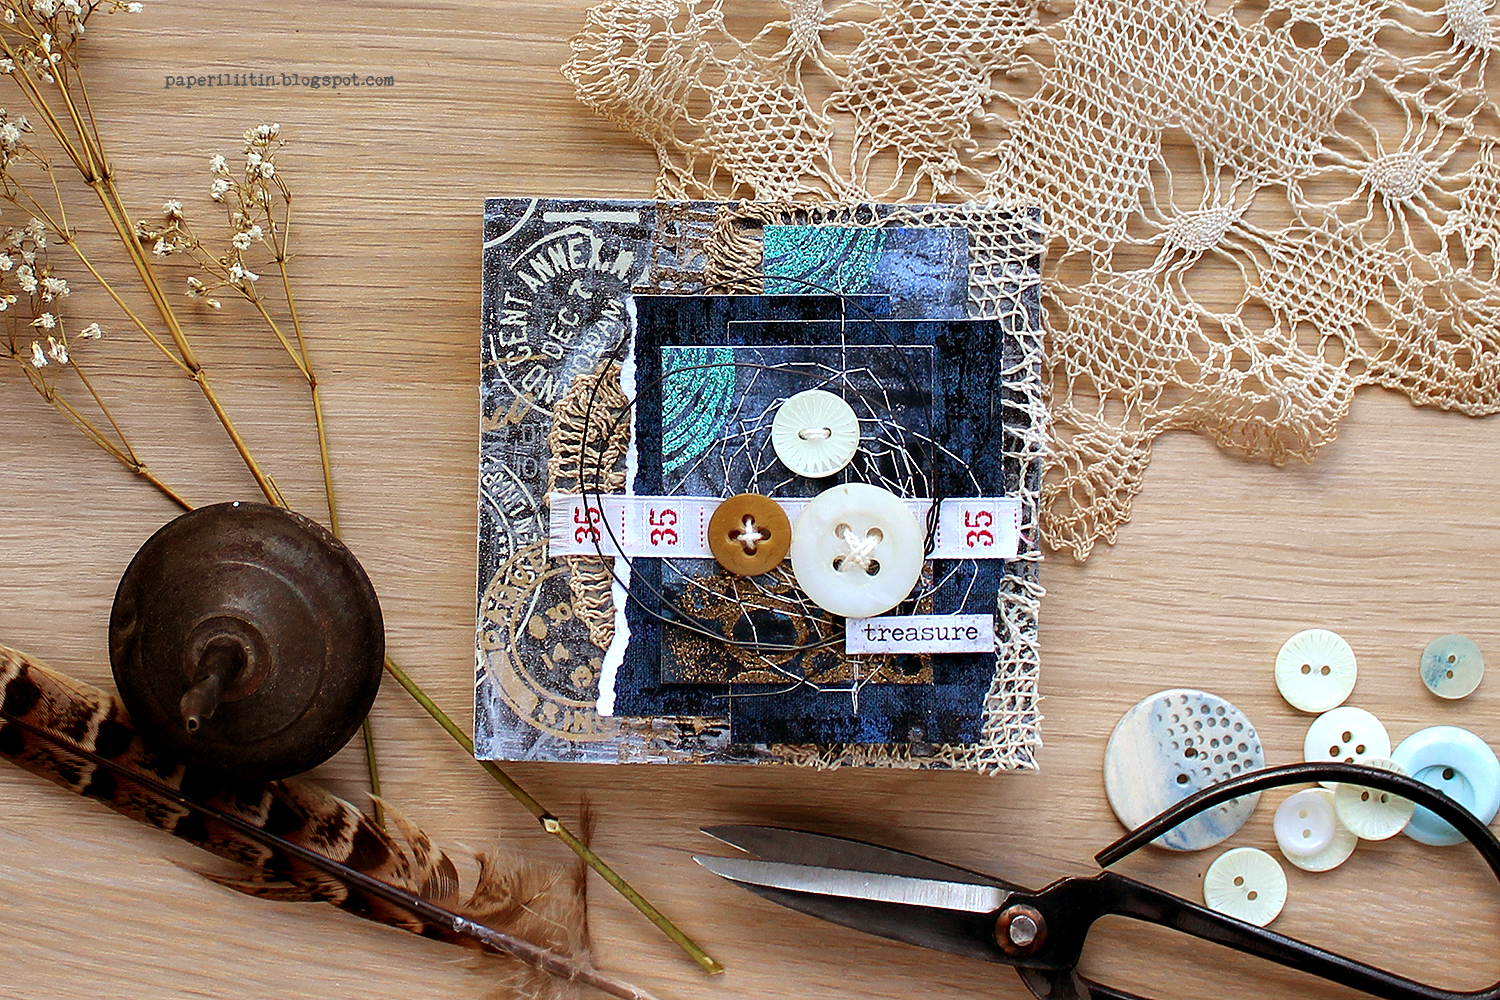
To bring that personal element to these projects and to have a theme, I chose to go with "sewing basket treasures". To tell you the truth, not all treasures fit to a sewing basket, but you get the idea, the common thread. The three projects have an arch in a way going from just small details to more based on sewing treasures.

What I also like about the sewing elements is how they have a big impact without costing big bucks. Most of the elements I included in these three pieces are actually heirlooms of sorts as they are partly from the sewing baskets of my two grandmothers. If you don't have heirlooms, you can usually find buttons, doilies and ribbons from flea markets.
Like I said earlier, these three projects have an arch starting with just a little sewing items. So as you notice, this piece only has some buttons, lace and sewing. Very much a paper based piece, but still getting impact from those sewing items. Naturally you don't have to stop to just buttons. Snap fasteners, for example, are gorgeous little metal embellishments. Or have you really looked at a safety pin? It's an intriguing shape, too.
What this piece also has is a monoprinted cardstock, which I also decorated with embossing powders and stamps. I show the process for that in this first video, but I use the piece in all my three projects. The three projects also have their base layers in common and I show those steps in this first video, too. While rummaging for the sewing details from my cupboard, I noticed this dark blue wrapping paper with golden details. I chose to use that as my base layer and it also determined the colors of the monoprinted piece. As you can see from the video, I start with collaging it into a wooden base and then add some white gesso through a stencil as well as embossed detail. I finish the base with ICE which I also use to adhere the lace in place. But without further ado, please see the video below!
What you can't see from the video is adding that ring of wire to the piece. I actually added that after I stopped filming as I felt the piece lacked a combining little element. A bundle of sewing thread underneath the buttons would have done the trick, too, but this wire ring was easier to add on top. And it might echo something in another project, too. Hint hint!
I hope you liked the post! Please be back tomorrow to see another version with a little more sewing items!
Thank you for stopping by today!
Materials:
Prima Marketing - Soft Matte Gel
GelliArts - 5"x7" printing plate
Prima Marketing - Heavy Gesso White
Prima Marketing -
acrylic paints
wrapping paper
old buttons
wire
old lace and ribbon


2 comments:
Love this and hope to try myself. I have many buttons and bits and bobs from my grandmother that I’d love to use.
What a fun project. Your style is wonderful and your commentary is very clear. Thank you!
Post a Comment