Showing posts with label easter. Show all posts

22/03/2024

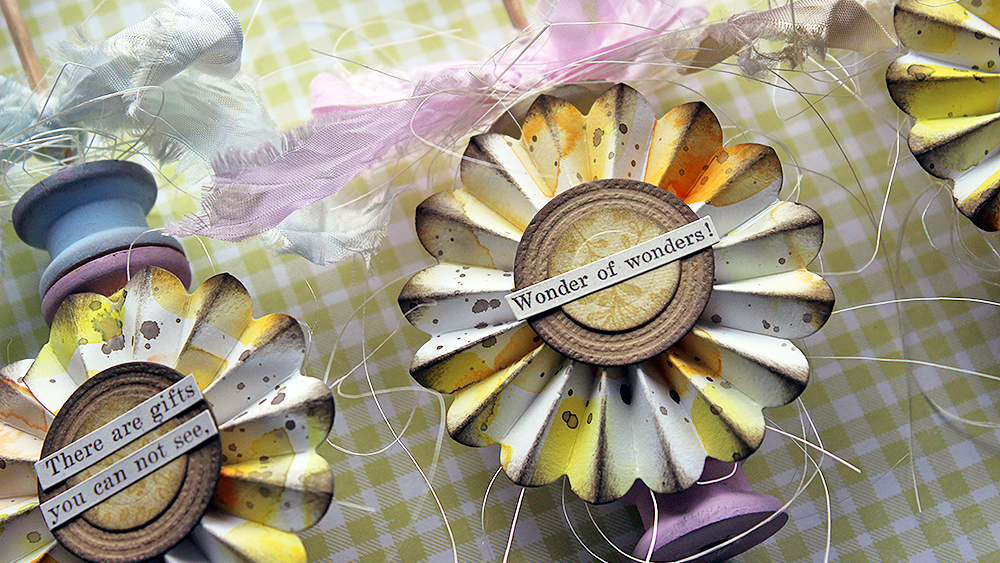
Wonder of wonders - Easter decorations


Moikka moi! Easter is drawing nearer so I have one more Easter inspired project to share! Next Friday is an exception to the rule as it's Good Friday. But a week after that, on 5th of April there's again a new process video published.

But back today's project. You may see something familiar in the very beginning as I used the extra pieces of the daffodil Easter card to cut the rosettes! Doing these kinds of decor projects is a bit problematic when it comes to the video. As I film from the top, I try to keep in mind to keep the elements flat rather than upright when working as otherwise you can't see anything! Hopefully I did ok! 


As you can see from the video, I started with candy colored pastels, but added some brown into the mix. It seems that I'm not able to leave that brown ink pad alone at this time! If you prefer stronger or purer colors, just adjust accordingly. I could also be fun to make a ROYGBIV set of these decorations!

Thank you for stopping by today! Wishing you a nice weekend!


Materials:

Sizzix: Thinlits Vault Rosettes die set 666567
PaperArtsy: Fresco Finish acrylic paint Butter, Blah Mange, Glacier Ice
Ranger: Distress Ink Speckled Egg, Kitsch Flamingo, Mustard Seed, Scorched Timber
wooden spools, wooden skewers
little plastic eggs
hot glue gun
Ranger: Distress Collage Medium matte
Tim Holtz Idea-ology: Christmas sticker book TH94294
sisal, white ribbon, baker's twine
paper cutter, scissors, inking tool, brushes, water mister, heat tool




01/03/2024

Daffodil dream - an Easter card


Welcome March! I usually love February as it's a nice winter month with sunshine and glistening snow, but no such luck much this February! Hopefully March brings the spring like they say in a Finnish saying "maaliskuu maan näyttää" - translated "March shows the ground" signaling the melting snow and start of the planting and sowing.

Last Friday I shared the last video of February, an Easter card duo, and today I have another Easter card! Where the duo was laying quite flat, this one has enough dimension for a couple of makes! If I remember my thought process correctly, I first thought to use the rosette in a different way and thought about what I could use it for in a cylindrical form. The Easter nearing made me ponder if I could use that as the center of a daffodil and as you can see, I could. If you want to see how I made not only the daffodil but the whole card, please see the process video below.


I guess it's the melting snow and overall dampness of spring that makes me grab the watercolors more! Or just another phase, but I think that the change in the preferred medium is a yearly thing. Here I used the watercolors to make the background pattern for the card and also added some visual texture to the daffodil petals using those. 

Have you noticed a link between seasons and your use of different mediums? Or is it always just phases without a yearly cycle?

Thank you for stopping by today! Wishing you a wonderful March and weekend!


Materials:

Fabriano: Accademia 160g cardstock pack
Prima Marketing: Art Philosophy Confetti watercolor set
PaperArtsy: Eclectica EM89 stamp
Ranger: Archival Ink Jet Black
Ranger: Distress Ink Scorched Timber, Spiced Marmalade, Wild Honey
Sizzix; Bigz Tree Rings, Mini die set 664232, Tattered Florals 656640
Sizzix: Thinlits Vault Rosettes die set 666567
Creative Company: Silk Clay black, Foam Clay white
stamen, twigs, sisal
white 220g cardstock
heavy body gel
double sided tape, foam tape, craft glue
scissors, stapler, inking tools, palette knife, ball point tools, paper cutter, brushes


23/02/2024

Easter Chicks - a couple of Easter cards


It's the last Friday of February and the last February process video, too! This time I'm making some Easter cards.

As you can see from the process video below, I used die cuts in a couple of ways while making this card. I made some foam stamps with the dies but also included the same elements cut from paper as embellishments for the card. 


I don't own a Easter die set as such, but with a little imagination, you can use all sorts of elements to make an Easter card. Here I used the bird die to make a chick just by snapping the long tail off and using yellow to color the shape. I think it works just fine! Next Friday there might be something similar, hint hint. 

Thank you for watching and stopping by today! Wishing you a sunny weekend! 


Materials: 

Fabriano - Accademia 160g cardstock
PaperArtsy - Fresco Finish acrylic paint Buff, Butter, Key Lime
Ranger - Archival Ink Sunflower, Vibrant Fuchsia, Garden Patina
Ranger - Distress Ink Crushed Olive, Mustard Seed, Wild Honey
PaperArtsy - Words 3 stamp set W3
Sizzix - Thinlits die set Silhouette Birds 665861
Sizzix - Thinlits die set Pretty Posy 662576
Sizzix - Framelits die set Circles 657551
Korttipaja - Sentiment stamp sets
yellow cardstock
EVA foam, twine, epoxy stickers
pencil
double sided tape, craft glue, foam tape
paper cutter, scissors, inking tool, brayer, water mister


05/04/2023

Peaceful Easter time - altered eggs for Ihana


The new issue of Ihana is soon out, but these eggs are something I created for the 2/23 issue for Easter time. They are altered paper maché eggs, with romantic feel. 

Obviously I can't share the steps here, for those you need to get your own copy of the magazine, but these were fun to make! I got to use my two favorite mediums and also tried my hand a little with the paper flowers. I didn't do the flowers properly, though, as I used a flower punch and thus the different petals had different grain in them. But those tiny flowers still look the part! 

With these eggs I want to wish all of you peaceful Easter time or just lovely weekend, if you don't celebrate. Rauhallista pääsiäistä! Thank you for stopping by today.


14/03/2023

Bunny boy - a card


Moikka moi and happy new week! I realized some time ago that Easter is almost around the corner andI haven't done any Easter projects as such! I did decorate some eggs for the recent issue of Ihana, a Finnish craft magazine, but that's all. 

So, after that realization, I did this card. I turned one of Tim Holtz's portrait vintage photos into a little Easter bunny by coloring his nose and cheeks and adding drawn bunny ears on top. A.B.Studio's dotted paper provided a perfect egg-like background. I also used the same paper to cut a multitude of little eggs in front of him, kind of he'd be holding a basket.

Instead of adding "Happy Easter" as the sentiment, I chose a more open one. The strip reads "Trust tomorrow", which I thought was in the spirit of Easter.

Thank you for stopping by today! Wishing you a fine week! 


Materials: A.B.Studio, Tim Holtz, Ranger, PaperArtsy, Posca


15/03/2021

An Easter card


Hi there and happy Monday! Easter is drawing nearer so I did a quick Easter card the other day. I used different Distress Inks in this one. 

I started the card by making the background using stamps, stencils and inks.I also created the eggs using inks. First I splashed a couple of colors to a piece of white cardstock, then cut the eggs and then inked around the edges using Vintage Photo - my favorite color. 

To finish the card I added a Tim Holtz doll there, some cut out branches and a couple of sequins and stickers. The sentiment is done using a Dymo Junior.

Thank you for stopping by today! Wishing you a wonderful week!


Materials: Ranger, Tim Holtz, Dymo, Prima Marketing


Related Posts Plugin for WordPress, Blogger...