
It's a new week! How did your weekend go? Crafty, I hope! Here's a canvas I created to my brand ambassador post for 7 Dots Studio with a step by step. Hope you enjoy!
I was so happy when I got the new 7 Dots Studio collections. They are, once again, so gorgeous! I love how each time a new collection comes out, I'm sure that those are my favorite collections ever, but then another one comes along and it's even better! I don't know how Dee Dee does it! Have you been able to play with the new collections yet? I hope you have, because like I said, they are gorgeous! If you haven’t familiarized yourself with them yet, they are called “Garden Party” (link) and “Air Mail”. I used the latter for my creation today.


Besides the fantastic new products, the inspiration for this piece came from my struggle to get a room for those in my craft space. I craft in our living room, so it’s not a huge space and I need to consider what or how much I can store. So, I went through my stash and for example removed some of the die cut shapes from the sheets just to make more room. If there was just a few left in the sheet, rather store those shapes than the whole sheet, right? But I really liked the lace-like, stencil reminding shape of the die cut sheet itself. So before putting them all to the recycle bin, I created this canvas with some of them.
Underneath is a step by step so you can see the process.
Underneath is a step by step so you can see the process.
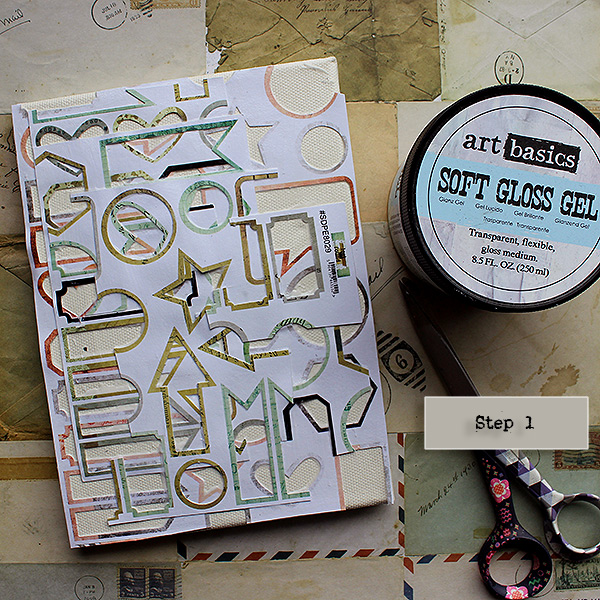
Step 1. Using Soft Gel or other thin gel medium or adhesive, adhere the die cut sheets and parts of them to a canvas. Stack the sheets so that there’s a lovey mismatch of the gaps, like little windows or peek-a-boo books. Let dry or use a heat tool to dry.

Step 2. Add even more texture to the piece using stencils and Modeling Paste. Mix two patterns if you wish to create a more varied look. I used a geometric “Squares” stencil together with “Floral Knot” here. Let again dry or use a heat tool carefully.

Step 3. Paint the canvas using white gesso to prime it. After drying the gesso layer color the project using your choice of colorant – I went with watercolors and mists. Gesso layer allows you to add any colorant – even inks. If you wish to create a more vibrant look and choose to go with acrylics, the gesso isn’t needed. Translucent mediums allow the die cut colors still to be seen underneath the colors where as opaque turn them just 3D texture.

Step 4. Using old book pages or other soft paper that’s easy to roll, make some paper straws. You can use ready straws, too. Add also one more layer to the background using stamps. I again mixed two sets, the new “Air Mail” and older “Dreamscapes”. As the surface where you’re stamping is textured, I’d recommend not using an acrylic block because without it you’re able to manipulate the stamp to the grooves as well.

Step 5. Create a base for your main composition using the paper straws you just did, a tag from the “Air Mail” set and some cut out envelopes from the “Delivered” 12x12 sheet. Use 3D Gel or equivalent as you adhesive.

Step 6. Fill the composition using a flair button, flowers, leaves and chipboard leaves from the “Homegrown” set. Follow the chose color scheme as I did with my “tea rose” choice. If the chipboard shapes seem too pale, you can naturally color them using watercolors for example.

Step 7. Finish the canvas using twine, thread and little crystals. Make a round “frame” out of twine and add it in place. Secure the twine in place by little drops of adhesive or by adding it underneath the flowers, leaves and crystals. Make little fuzzy nests out of twine – just pull it from the roll, gather in your hand not too tightly so it’s fluffy and airy looking. Lift the roses a little and tuck the thread nests underneath them. Let dry overnight or as long as the adhesive is dry.
Thank you for stopping by today! Wishing you a beautiful July!
Thank you for stopping by today! Wishing you a beautiful July!

Materials from 7 Dots Studio:
Soulmates – Squares Mask
Lost and Found – Die cut Elements 6x12
Homegrown – Chipboard
Um Wow Studio – Writer’s Block Written Flairs

Materials: 7 Dots Studio, Prima Marketing, Ranger, Um Wow Studio


No comments:
Post a Comment